A fresh coat of paint can do wonders for your home’s appearance, instantly revitalizing and transforming its aesthetic appeal.
However, proper preparation is crucial to ensuring a successful painting project. In this blog post, we’ll share ten expert tips to help you prepare your house for a painting makeover that will leave it looking fresh and fabulous.
1. Plan Your Project
Before diving into the actual painting process, take the time to plan your project thoroughly. Consider the scope of the work, your budget, and your desired timeline.
Make a list of the rooms or areas you want to paint and prioritize them according to their importance or levels of effort required. Also, consider the best time to paint – ideally, choose a period with low humidity and mild temperatures to ensure optimal drying conditions.
2. Choose Your Paint and Supplies
Selecting the right paint for your project is essential. It is important to consider factors such as colour, finish, and virility levels.
Consult with a paint professional or do some research online to determine the best paint for your specific needs. Additionally, gather all necessary supplies, including brushes, rollers, paint trays, drop cloths, painters tape, and any other tools you’ll need for a smooth painting process.
Although finding the right colour could take some time, Dulux or Haymes could be a good start.
3. Clear the Area
Remove all furniture, wall hangings, curtains, and other items from the room or area you plan to paint. If you can’t move everything out, group the items in the centre of the room and cover them with drop cloths or plastic sheeting.
This will protect your belongings from paint splatters and make it easier for you to move around the room while you work.
4. Clean the Surfaces
Before applying any paint, thoroughly clean the surfaces you plan to paint. Dirt, dust, and grime can prevent paint from adhering properly, leading to an uneven and unsatisfactory finish.
Use a mild detergent and water to clean the walls, then rinse with clean water and allow them to dry completely. If you’re painting the exterior of your home, consider using a pressure washer to remove dirt, mildew, and peeling paint.
5. Repair Surface Imperfections
Inspect the surfaces you plan to paint for any cracks, holes, or other imperfections. Use a putty knife and patching compound to fill small holes and cracks, then sand the area smoothly once it’s dry.
For larger repairs, you may need to use a joint compound or even replace sections of drywall. Don’t forget to address any loose or peeling paint by scraping or sanding the affected areas.
6. Protect Adjacent Surfaces
Use painters tape to protect baseboards, trim, and other adjacent surfaces from accidental paint splatters. Remember to also press the tape firmly against the surface to prevent the paint from seeping underneath.
Furthermore, it may be worth covering your floor with drop cloths or plastic sheeting to protect them from paint spills and splatters.
7. Prime the Surfaces
Priming is a crucial step in the painting process, as it helps ensure proper paint adhesion and a uniform finish.
Choose a primer that’s compatible with your chosen paint and apply it evenly to the surfaces you plan to paint. Allow the primer to dry according to the manufacturers recommendations before proceeding with your paint application.
8. Plan Your Painting Strategy
Before you start painting, determine the best approach for your project. Work from top to bottom, starting with the ceiling (if applicable) and moving down to the walls.
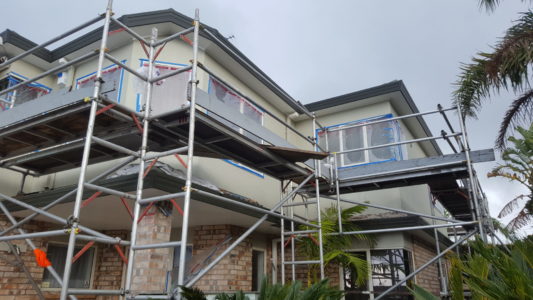
For the walls, use a roller for larger areas and a brush for cutting along edges and trim. If you’re painting the exterior of your home, you may need to use a ladder or scaffolding to reach higher areas safely.
9. Test Your Colours
Before committing to a specific colour, it’s wise to test it on a small area of the wall or a sample board. Paint colours can appear differently depending on lighting conditions, the time of day, and the surface they’re applied to.
By testing your chosen colour, you can ensure it’s exactly what you want before investing time and effort into painting the entire room or area.
10. Enlist Help if Needed
Depending on the size and complexity of your painting project, you may want to enlist the help of family members or friends to make the process more manageable and enjoyable.
Having an extra hands-on deck can help speed up the project and provide valuable input on colour choices, painting techniques, and other aspects of the process.
If your project is particularly large or complex, consider hiring a professional painting contractor to ensure the job is done right.
There are removalist companies out there too that could help you move your paint supplies, so hiring a Man with a Van With ZOOM can make the task much easier.
Preparing your house for a painting project can be a daunting task, but with proper planning and attention to detail, you can ensure a successful outcome.
By following these ten expert tips, you’ll be well on your way to a beautifully painted home that reflects your style and taste.
Remember, a fresh coat of paint not only enhances your home’s appearance but also helps protect its surfaces and increase its value. So, roll up your sleeves and get ready to transform your space with a stunning new look.