If your porch or deck is looking a little worse for the wear, a good sanding might be in order. Not only is sanding an essential step if you plan to add another coat of paint or stain, but it can help you enjoy your deck much more. Imagine summer mornings spent barefoot, watching the sunrise from your porch. Imagine leaning on smooth, splinter-free railings while your babies enjoy the outdoors safely within the confines of a well-maintained deck.
Depending on the condition of your deck and the results you desire, sanding can be a minimal effort designed to remove the raised grain left after a good power washing, or it can be an extensive restoration effort that brings an aging deck back to life.
Choose the Right Grit for the Job
Using the appropriate grit is important. Grit must be matched to the type and condition of the wood you’re sanding. Sandpaper that is too rough will remove too much wood and damage the surface of the deck; too fine, and the abrasive won’t be able to effectively remove old finishes or smooth damaged areas.
If your deck has a lot of peeling paint, or if the wood is very rough, start with 36 or 60 grit paper. Use a light touch to avoid removing too much wood.
The surface will be fairly smooth at this point. If you like, you can stain the deck at this stage. However, many people prefer a finer finish, especially if children are going to be using the deck. For a smooth, hand-friendly surface use 80 or 100 grit sandpaper in the next step.
Don’t worry about making the deck floor perfectly smooth. You just need to remove any splintering and blend rough or damaged areas into the surrounding surface.
Handrails and sitting areas, on the other hand, benefit from a little more care. Feel free to go with even finer grits to achieve a perfectly smooth surface that won’t snag clothing or hurt your hands.
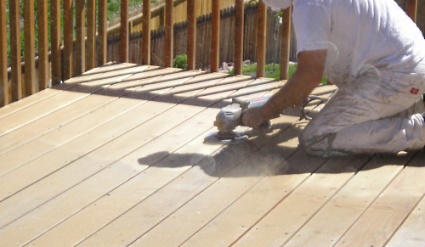
Know Your Sanders
Using an electric sander cuts down on time and effort. It’s important to understand how the sander you choose works. For example a vibrating or random-orbital sander tends to make squiggly marks if too much pressure is applied. You don’t want to have to sand these marks out by hand, so always use a light hand.
Use Correct Technique
Always sand in the direction of the grain whether you are working by hand or with a sanding machine! Working across the grain tears up the fibers. This will show up when you apply your deck stain. If you can’t avoid sanding cross-grain, then you’ll need to use a finer grit to keep the scratches small. It’s far more likely that the grain of the wood will camouflage fine scratches.
Once your deck is smooth, you’ll need to remove as much dust as possible. Sanding can clog the pores of the wood and make it difficult for stain to penetrate effectively. Using a pressure washer on a low setting will remove sanding dust. Alternatively, use a leaf blower or vacuum cleaner to remove the dust.
If you use the proper technique, your fresh coat of paint or stain will make that old deck look new and vibrant once again.