With some basic skills and good drywall tools you will be able to tackle that hole or dent, achieving a great looking repair. These drywall tools will be handy during many drywall repair projects, but some are for when entire rooms are to be hung and finished.

Here’s the drywall tools you need for big jobs and small:
- Drywall. Normally drywall comes in sheets either 4×8′ or 4×12′ and thicknesses of 1/2″ and 5/8″. But hardware stores often carry smaller sizes because for the traditional sizes, buyers either need to own a pickup truck or pay for delivery. You may also be able to pick up drywall scraps from a new construction site. For most contractors, drywall pieces are garbage.
- Drywall Mud Pan. Twelve-inch stainless steel pans work best. They cost little and clean up better than plastic pans.
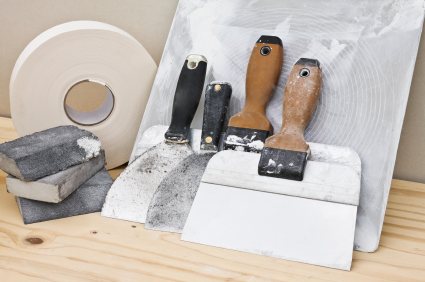
- Taping And Finishing Knives. Quality taping and finishing knives will make the job a lot easier. Knives which are three and six inches long are used for taping and finishing small patches. Eight-inch knives are for intermediate finishing and 12-inch knives are for the final application of patching mud, more properly referred to as patching compound or joint compound.
- Trowel. The trowel helps you spread patching compound over large areas. Much faster than using common drywall knifes but requires some skill.
- Hawk. Professional drywallers use their trowel to load the flat metal tray (aka hawk) with the drywall compound. This type of tray has a handle underneath in the center. Because the shape is square, it is easy with a bit of practice to lay the patching compound onto the joints in the sheetrock or into holes and other damaged areas. It doesn’t take much practice for do-it-yourselfers to master using a trowel with a hawk.
- Sharp Razor Knife. Cutting drywall is easy, but you’ll need a sharp razor knife. There is an almost endless variety. Safety is an issue when cutting drywall, so consider a model with a tight grip that will be less likely to slip from your hand. Drywall saws are good too.
- Drywall saw. Also known as a keyhole saw because of its long, narrow blade. Most of the cut takes place on the pull stroke.
- Drywall Rasp. The drywall rasp helps you smooth the cut edges.
- Drywall Hammer. There is a hammer made specifically for drywalling. If you choose to use nails instead of drywall screws, this is the only type of hammer you should use to set fasteners. The head is shaped to minimize damage.
- T Square. A good T-square is an indispensable tool for marking and for using as a cutting guide for scoring the drywall into smaller pieces.
- Carpenter’s level or straight edge. When cutting drywall freestyle, without help from a straight edge, the knife never seems to want to stay on the line. A straight edge is very important.
- 25-foot Measuring Tape. Wider tape measures are more rigid, allowing for longer measurements without needing an assistant.
- Chalk line and blue chalk. Chalk lines are used in situations where it is otherwise difficult to scribe a straight line.
- Drywall lifter. A drywall lifter is a nifty tool that is used, with help from your foot, to lift drywall panels an inch or so off the floor. It’s not essential.
- Pencil. Professional results only happen when you take the guesswork away. Measure twice and cut once.
- Furring strips (if using Furring Strip Method for hole repair). Furring strips usually come in 1×2″ sizes and are up to eight feet long.
- Stud finder. While a stud finder may not be essential, they are a real boon to someone who is hearing impaired. Many people can locate studs simply by lightly tapping on the wall. For others, the stud finder is very helpful.
- 1.25″ Drywall screws. Screws are far less likely to pop than nails and are the only option when using the furring strip method.
- Variable Speed Drill. Because screws hold drywall more effectively than nails, a variable speed drill with a screwdriver attachment for installing the wallboard can be a real time saver.
- Heavy-Duty Pail. You need something in which to mix the joint compound with water. Rarely is “mud” thin enough to work with. 5-gallon buckets work great for larger jobs.
- Mixing Paddle. If you are patching a small area, you can use a hand mixer. For large jobs, a heavy duty drill with a mixing paddle attachment makes the task a lot easier.
- Sanding Tools. Your sanding tools can range from simple medium-course sanding blocks to specialized drywall sanders. A pole sander will make quick work of large areas, especially ceilings. To cut down on dust, you can use a sanding attachment for a shop vac.
- A Bucket Of Water. Be sure you always keep water handy. You can use it to clean tools as you go. Or to clean your hands a bit before answering the telephone, which is most likely to ring during the messiest part of the repair job.
 Many of these drywall tools are useful for small repairs while some are specifically for large repairs. Some of these tools might already be in your toolbox or even in your kitchen. An extra long bread-pan that’s never used can be repurposed into a drywall mud pan. You probably have buckets and rags around the home. The nicest thing about working with drywall compound is the ease with which it cleans up.
While no homeowner looks forward to repairing a large drywall hole, it is not difficult or expensive. Collect the proper tools and supplies. Take your time. Being a perfectionist will pay off with a seamless drywall hole repair.