Faux combing is a classy way to jazz up your walls. From the look of crisp linen, to the sophistication of a wonderful weaved appearance, there are a variety of ways to apply faux combing techniques. Once you’ve mastered the basic combing paint effect, you’ll be anxious to try some of these faux combing variations.
What is faux combing?
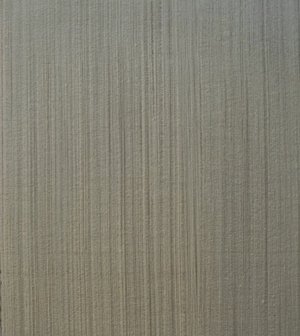
Faux combing is the process by which a combing tool is run over wet glaze or paint, lifting it off, and revealing the paint beneath. Traditionally, this combing technique is used to create a pinstripe appearance.
Combing goes by a few different names, so don’t be surprised to hear it termed faux dragging or drag painting. Dragging refers to the way in which the combing tool is “dragged” through the wet glaze or paint to create the texture.
Tools and materials to create the faux combing painting effect.
- Latex paint in satin finish (your choice of color)
- Glaze (your choice of color)
- Two 3/8″ paint rollers
- Two paint trays
- Container to mix glaze in
- Rubber combing tool (or other combing tool)
- Primer if needed
- Drop cloth
- Painter’s tape
Basic Faux Combing Technique
1. Prepare the wall.
- Be sure the wall is clean, and free of dust. If wallpapered, the wallpaper must be removed first. The wallpaper may bubble, ruining all your hard work.
- Use painter’s tape to tape off baseboards, etc.
Tip: Priming your walls is not a must-do, but I advise it as it helps paint adhere.
2. Paint the wall with base coat.
- Apply the base coat of wall paint with a paint roller.
- Let dry.
3. Paint the wall with glaze.
- Starting at the top left corner of the wall, paint a three foot wide section of glaze from ceiling to floor using a paint roller. You should end up with what looks like a “stripe” of glaze running top to bottom.
Tip: Don’t be tempted paint wide sections of glaze on the wall. It will dry before you can comb it! Stick to a three foot wide section.
4. Drag the glaze.

- Starting at the same point where you first applied the glaze, drag your combing tool through the glaze. Use a steady hand, and once you start dragging, don’t stop until you’ve reached the floor. A smooth, continuous movement is critical to a professional look. It isn’t easy to make one continuous drag all the way down the wall without a little bit of help. Consider grabbing an assistant or two to hand the combing tool off to along the way.
- After each use, wipe your combing tool with a clean rag (lint-free is best) to remove excess glaze. A buildup of glaze on your combing tool will make for a sloppy, inconsistent effect.
- Continue in this manner until you’ve completed your first section. Make your best effort to line up the combing tool with the previous comb marks. Perfection isn’t necessary, but uniformity will make your faux dragging look the best.
5. Continue painting then dragging the glaze.
- Continue painting as in Step 3, then dragging the glaze as in Step 4 until you’ve completely covered the wall in the combing paint effect.
Tip: Overlapping the glaze with the edge of the paint roller will help hide where the glazed sections overlap.