Leather has been a popular material for furniture for years. Now faux leather painting has come into its own as an attractive finish for walls. The beauty it adds to a room is just one of the benefits. Another very important one is the fact that your walls do not have to be perfect to apply a faux leather finish to them. Just as real leather has flaws and blemishes, if there are a couple little nicks in the wall, it is possible to cover these up with this faux technique.
If you want to improve your home, this is one of the projects you should consider. The procedure is simple, the look is fantastic and no one will ever guess you did it yourself if you can keep a secret.
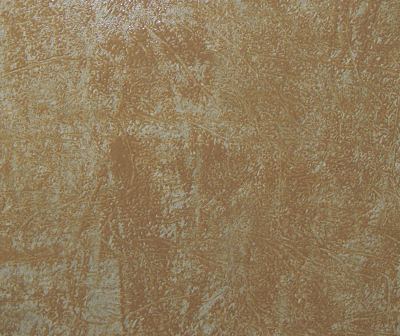
For this photo, the colors where chosen to help show the leather pattern produced using this faux leather painting technique. A better looking leather would use a darker back ground.
What Will You Need?
Here is a list of the supplies you will need to get started finishing your walls and enjoying the look of faux leather in no time.
- Painting supplies – brushes, tray and rollers, painter’s tape and one each tan and cream latex paint.
- Base paint
- Containers for mixing and stir sticks
- Glazing medium
- Water
- Clean cotton rags and cheese cloth
- Thin painters plastic
- Scissors
Wall Preparation
While you need minimal preparation for this faux finish, you still need to get the wall ready to paint. Remove everything from the wall you will be working on. Now, wipe down the wall or vacuum it. If it’s near a kitchen, you should wash the wall down with a solution of tsp and water. Remove the electrical plates and apply blue painter’s tape to the edges of everything you want to stay paint free.
Now put a coat of the cream paint on the wall with the roller. Paint like you typically do using a brush to trim around the painter’s tape and the electrical outlets. As it dries you will be able to tell if you need to apply another coat.
Now for the Faux Leather Look
The general idea is to lay the painters plastic over the glazed wall, remove the plastic and have your first look at the leather texture. The best way to do this is in sections; either 2-4 foot wide strips from the ceiling to the floor or 4×4 squares. This will look like leather panels on your walls.
Measure the sections you want, apply the blue masking tape (you can also use Frog Tape). You will be painting the faux leather look on every other section, allow to dry completely then return the fill in the remaining sections.
Prepare the Glaze
Using your paint tray start mixing the glazing medium and the tan paint until it is the color you want on your walls. Use 1 part paint – 4 parts glaze. Put the glaze into the paint roller pan.
Apply the Glaze and Take-off the Glaze
Using a paint roller apply a good coat of the glaze/paint mixture to a section ready for this faux leather painting technique. Now crinkle-up a piece of painter’s plastic large enough to completely cover the section.
Lay the plastic over the glaze. Push the plastic into the glaze by lightly rubbing with a paint brush. You can use the palm of your hand but be careful not to cause finger prints in the glaze. Don’t worry if there are random crinkled areas. This is what makes the faux leather look.


Carefully peel off the plastic. This will remove some glaze and reveal the texture or pattern underneath.
The pattern can be softened by lightly padding with dampened cheese cloth. This will remove some glaze so be careful not to remove the faux leather pattern. Allow this glaze coat to dry completely before continuing.
Now, mix another glaze to apply over your new leather look. This glaze coat can be any complimentary color but using a 50-50 mix of the base color and leather glaze color will look good. This time the mixing ratio is 1 part paint – 3 parts glaze – 1 part water. This will be thinner than the first coat of glaze.


Apply a thin coat of glaze with a brush and roller to one section at a time. While the glaze is still wet use a piece of cheese cloth large enough to fit in your hand and lightly pad the wet glaze. Dampen the cheese cloth with water and squeeze out the excess. This will soften the look and help reveal the underlying leather pattern.
Repeat the process with the other sections.
Faux Leather Painting Tips
- Just do small parts of the wall at a time because the glaze will dry out quickly. When this happens, you’ll have sections where the glaze is too heavy, ruining the leather effect. The key to creating the perfect faux leather walls is to take your time. If you get in a hurry and try to do too much of the wall at a time, the glaze will dry on one section while you are working on another and the look will not be leather.
- As the plastic fills up with paint, throw it out and get a new piece. It helps to have several pieces ready before starting.
- Many people use a stippling brush to achieve this look. If that is your preference, you use it instead. However, the procedure outlined here works just as well, and it is easier in my opinion.
- Another technique that works is using two layers of paint and a finishing layer of glaze. The second color of latex can be applied with a plastic bag. Then a final layer of colored glaze may be applied and dabbed off with a rag. The third layer completes the leather-like look.
- Cowhide can be mimicked by using a rich caramel undercoat with a rich brown glaze. Lay sheets of old newspaper against the wall. Use a sliding motion with your hand against the paper. It will lift some of the glaze.
Creating the look of leather on your walls is a fun project and you will be pleased with the end result. The soft look of leather can enhance your home and the room will truly be your own personal creation.
The entire cost of faux leather painting is not expensive, but it can make your room look expensive. All that is left now is to clean your tools, put up a few paintings to set off your new wall, sit down, relax and enjoy your new room.