Drywall nail pops are common in new construction. They are a result of the house settling. While they are annoying and ugly, they aren’t serious. Fixing drywall nail pops is a pretty easy job.
What Is a Nail Pop?
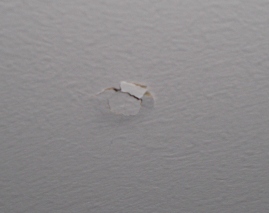
 Drywall nail pops happen when drywall nails or screws loosen or shift. They appear as quarter-sized dimples or bubbles in the drywall. In some cases, the nail will actually “pop” out so far that you can see the nail head.
Each drywall nail pop occurs along a stud where the drywall (also known as sheetrock) is attached to the stud. They show up on both walls and ceilings— anyplace the drywall is attached to the framing.
Preventing Nail Pops
An ounce of prevention is worth a pound of cure. Drywall screws shift less than nails do and are far less likely to “pop”. Choosing screws will go a long way toward avoiding this type of repair. Of course, once nails have been used, you need to know how to fix the problem when it occurs.
How to Fix Drywall Nail Pops
Before you start the job, gather the following supplies:
- Nail punch
- Hammer
- Drywall screws
- Drill with screwdriver attachment
- Multipurpose joint compound
- Safety glasses
- 4-inch drywall taping knife
- Fine-grit sandpaper/drywall sanding screen or saning sponge
- Texture and related tools
Steps for Fixing Drywall Nail Pops
- First, determine if the drywall is attached to the studs with nails or with screws. Nail pops are more common with nails, but can sometimes occur with screws too.
- If the drywall is affixed with nails, drive the popped nail back into the stud as far as it will go. Denting the wallboard slightly is ok. The damage will be covered up later. Use a nail set to recess the nail rather than a hammer. A hammer will dent the drywall and make covering up the hole more time consuming. Instead, use a nail punch. This will make it easier to sink the head of the nail below the surface of the wallboard.
- If the drywall is attached with screws, use the drill to drive the popped screw back in. If it spins and won’t go in, the head may have separated from the shaft of the screw. Dig it out.
- Take pressure off the popped nail or screw by driving a wallboard screw approximately 1″ above the pop. It should be slightly recessed, so that it won’t show through the paint. Drive a second screw 1″ below the pop.
- Using the drywall taping knife, apply a thin layer of joint compound over the holes, smoothing so that the repair is flush with the surface. Allow to dry (2-4 hours).
- Repeat step 3 on all nail pops.
- Look closely at the repair. If a dent is still visible, or if the joint compound has shrunk, you may need a third coat.
- Smooth the area with fine grit sandpaper. “Feather” the repair until it blends into the surrounding wall.
- Retexture as necessary to match surrounding texture.