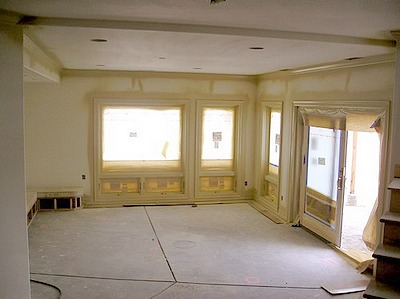
New construction and remodeling projects pose different challenges when it comes to interior painting. While there is minimal prep work to do if the sheetrock hanger has done the job right, there are some things you need to know before you take up your paint roller and brush.
What Needs to Be Painted?
First, evaluate the surfaces you are going to be painting. Painted wood work is often treated with an oil/alkyd base paint because of the inherent flow of solvent-based paints. The finish also tends to be harder and easier to scrub. You can use latex (acrylic water based) paint for trim but make sure it is labeled “enamel trim paint.” This will be a harder type of paint well suited for woodwork.
Sheetrock and new plaster is almost always painted with latex (water-based) paint. The advantages of easy cleanup, fast drying and reduced dust pick-up make latex a popular choice for interior walls.
Choose the Right Primer.
An acrylic top-coat will adhere to an alkyd base primer. So you will have some choices for the walls and trim. A fast drying alkyd primer is a good choice for woodwork as it can be sanded smooth. An enamel undercoater is the best choice for woodwork that will be painted.
Walls are best primed with an acrylic primer. For a single room use a universal acrylic primer. For multiple rooms or the entire house use a PVA wall board primer.
There are some excellent water-based primers available today, so you can choose a water-based latex primer for woodwork as well as sheetrock. Latex primer is compatible with any latex or oil base paint.
Calculate How Much Primer and Paint You Need.
Measure the room and calculate how many square feet you need to paint. The easiest way to do this is to measure how long the room is in inches. Then measure how wide the room is in inches. Multiply this figure and divide it by 144 (1 square foot in inches, 12×12). This tells you the square feet for the ceiling.
To calculate the square feet for each wall, measure its length and height. Multiply these two figures and divide the answer by 144. Repeat for each wall. When you add the answers for each wall together, you have the information you need to calculate how much paint and primer you will need.
To calculate primer, add the square feet for the ceiling together with the square feet for the walls. Divide this figure by 250, 250 sq/ft per gallon. This will tell you how many gallons of primer you need to paint the entire room.
Calculating the finish paint you need is based on the same method, except you add together only those areas you are painting with the same color. You still divide the answer by 250 to calculate how much paint is needed for the different colors you plan on using. If you plan to use a single color, you will need up to twice the amount of paint as you need in primer. It depends upon your choice of paint.
If you purchase a high-coverage paint that applies in one coat, you may only need the same amount of paint as primer. This is especially true when the primer is white and the finish paint is also white.
In general, though, even finish paints that claim to be single coat have the best appearance after two coats of paint have been applied.
Note; 250 sq/ft per gallon works well for most textured surfaces. You will need less paint for smooth surfaces. Use your best judgment and the coverage information on the can.
Mask Off Windows and Trim.
Keep the new room looking sharp by masking off all the windows. Plastic is a great help along with blue painter’s masking tape.
If the trim has already been installed, carefully masking off the trim to protect it from stray paint is a wise investment of your time. If you can paint before the trim has been installed, do so. It makes the job much easier.
Remove Any Switch Covers and Outlet Covers.
If the electrician has already been through, remove any switch and outlet covers. Mask the switches and plugs so you don’t have to worry about getting paint on them.
Choose Your Painting Method.
You have two choices for painting the surfaces of the room—roller or paint sprayer. While rolling takes more time, it uses less paint. With paint spraying, you have to be careful about overspray.
Using a sprayer only makes sense if all wall and ceiling surfaces will be the same color. A paint sprayer can be used for just the primer, primer and ceiling(s) combined or the entire room.
A paint roller is best suited for multiple colors. Example-ceiling one color and walls another.
If you are less experienced, rolling produces excellent and professional results. If the ceiling has an acoustic or popcorn finish, then you will want to paint it with a sprayer. New acoustic ceilings don’t have to be painted, they can be left as is.
Paint on the Primer.
First, “cut in” the corners between the walls and the ceiling. Then “cut in” the corners between walls. Your goal is to paint an area about 4-inches wide so it’s easy to keep the roller out of the corners. Doing this eliminates blobs of paint where the roller hits the opposite surface.
You’ll want to start with the ceiling. Then move to the walls. There’s no need to let the ceiling dry before moving to the walls as the primer is all the same type and color. Make sure you let the primer dry for the number of hours indicated on the can.
Paint the Ceiling.
Unless you are going to paint the ceiling and the walls the same color, you will want to paint the ceiling first. Especially when rolling, the paint tends to spatter downward. If you paint the walls first, you will end up with spatters of ceiling paint all over the walls.
Allow the ceiling to dry completely. The label on the can of paint will tell you how long this needs to be.
Paint the Walls.
Now you can paint the walls. Start by “cutting in” the corners and the junction between the walls and ceiling. You’ll need a trim brush with beveled edges. Then switch to the roller.
Let the paint dry as directed on the can before repeating the process. As mentioned before, you may or may not need to add a second coat.
Now, you can stand back and enjoy the professional results!