While scraping is the first step of many painting tasks, the preparation should be finished by sanding away rough edges to create smooth, flat surfaces. It is important to feather – which means blend and even out – in order to minimize the hard edge of any remaining paint surfaces.
Sanding Removes Defects
Removing surface defects like paint runs, brush strokes and hard edges will make the final paint job look better and help the paint bond tightly. You also want to make sure that any paint left behind from previous coats is well-bonded to the surface.
A perfect sanding job actually requires a lot of time and effort. For instance, the best method involves starting with a coarse grit sandpaper before progressing to finer grades. You can probably get away with doing less, but remember that the best-looking and longest-lasting results require extra effort.
If you haven’t done so for the scraping portion of preparation, remember to clear the room of anything you care about. Furniture, plants, carpets, paintings, etc. Sanding creates a lot of dust. Removing things from the room is a time-saver in the long run. You should have removed electrical covers before scraping, but if no scraping was required, you’ll want to do that now. Then, it is a good idea to cover the exposed electrical outlets. Masking tape should do the job effectively.
Always Think Safety
Sanding releases a lot of dust into the air. Wear safety glasses and a consider wearing a dust mask, or even a respirator. Protective clothing is also a good idea – long pants and long-sleeved shirts will prevent skin irritation.
Shut down air conditioning and heating systems so you don’t pull dust all the way through your house. The dust can also clog filters and cause premature wear on your HVAC system.
If the home was built prior to 1978, please consult our instructions on lead paint safety. Lead paint is an extremely important safety concern and special precautions—or avoiding sanding altogether—are a must. If sanding lead paint is unavoidable, then always wear a respirator that is NIOSH certified. A dust mask is completely inadequate when working with lead-based paint. It is also a good idea to wear protective clothing like long-sleeved shirts and painters’ pants to prevent lead absorption through your skin.
Don’t forget that sanding exterior paint can contaminate nearby gardens, so cover them up. Don’t use plastic though, except on cloudy days. The trapped heat can cook the vegetation. Canvas is a more breathable material.
To reduce potential exposure to toxins, harvest any herbs or fruits and vegetables before starting your sanding project. Use drop cloths to catch as much sanding particulate as possible. Your neighbors may be affected and where wells exist, water supplies.
If you’re especially vulnerable to dust, the sanding can be skipped but remember the result will be a finish which is less than perfect.
Before starting to sand drywall, be sure to fill any cracks, holes or gouges.
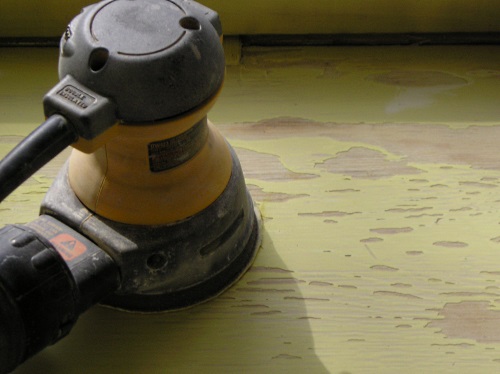
Once the loose paint is scraped away and all remaining paint is feathered and has good bond to the surface, the next step is to sand the surfaces where paint has been removed.
Power sanders will speed up the job but for smaller areas, hand-sanding with a sanding block works best.
Once surfaces are scraped, sanded, and room vacuumed, it’s time to give your house a good washing. Cleaning the surface free of dirt, grease, loose or flaking paint is essential for the primer and paint to properly adhere to surfaces. It is essential to wait until are surfaces being painted are completely dry before proceeding.
When you’re finished sanding indoors, vacuum thoroughly. If lead-based paint is involved, ensure the vacuum has a HEPA filter. Don’t forget to vacuum any furniture that was left in the room.