 Before refinishing wood, you need to remove the old finish. The easiest way to do this is by sanding the wood. This creates small abrasions that stains or finishes can soak into. This ensures color isn’t just on the surface, and it improves the protection your new finish will give the wood.
There are good reasons for sanding wood that go beyond simply smoothing a surface.
- New wood trim can have a shiny look. This is called mill glaze. The mill process that created the wood trim profile causes mill glaze. This must be removed in order for the stain or finish to penetrate properly.
- Chemical stripping always leaves a little finish behind. Sanding is the only way to remove all remaining finish.
- Scraping and the use of a wood plane will close the pores of wood by crushing the fibers. Sanding the wood opens these pores, helping the finish to penetrate.
- Sanding creates tiny, invisible scratches on the surface that enhance the bond of non-penetrating finishes.
Even if you use a chemical stripper, sanding is necessary to open the pores of the wood back up. It is not difficult to do, but sanding wood does require careful planning and work.
Prepare to Remove the Wood Finish with Sanding
Before sanding anything, prepare it for the process.
- If you can, remove the wood from its fittings. This may be impossible for trim, but doors should always be taken off their hinges.
- Any locks, handles and accessories should be removed.
- If you are sanding a doorframe remove weather stripping.
- If you are not able to remove the wood or things attached to it, use masking tape and paper to protect everything you don’t want to sand.
- Label everything as you remove it, and make sure to keep everything together so re-assembly is easy.
Get Sanding Equipment
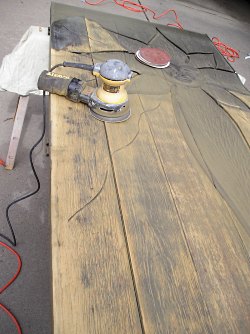
There are two different ways to sand wood—power or hand. You can use power sanders, such as palm or orbital sanders, to speed up the process. Just be aware power sanders can leave visible grooves in the surface. However, even when power sanders are used, hand sanders are often used to smooth out those grooves or in parts of the wood that are contoured. Use a sanding block with the sand paper to spread pressure and speed up the work. You can also use sanding sponges for hand sanding work.
Sand the Wood
Sandpaper is graded by grits. The higher the number the finer the grit.
Always start sanding with the lowest grit, such as 80 or 100 grit. This will quickly scratch away old finishes but will leave the wood rough.
Use progressively finer grits to remove the old scratches, going to a 120 or 150 grit, followed by a 180 grit. This will remove the deeper scratches and replace them with a much finer pattern of scratches.
You should be sure that all the old scratches are sanded over before moving up to a higher grit. By the time the wood is sanded with 180 grit sandpaper, scratches should not be visible.
Sanding for Different Finishes
Some stains make deep scratches very prominent. If this is a look you want, then you don’t have to got up to 180 grit. For most stains and finishes, sanding should not go past 180 grit anyway, because it will make it harder for varnishes and lacquers to bond with the wood. Oils like Tung or Danish oil, however should have a much smoother surface because they cannot be sanded in between coats.
Carefully sanding wood will remove the old finish. This makes it much easier to apply a new finish to your wood and make the wood appear much better. After sanding and then refinishing wood, it will look much more pleasant.
Tips for Sanding Wood
- Refold or shift the sandpaper on the block often to expose fresh cutting surfaces.
- Vacuum or brush away the dust as you sand. This will keep the dust from loading the sandpaper.
- Before continuing with a finer grit vacuum the surface. This will remove the dust and any abrasives that have come loose from the previous sanding.
- Sand with the grain never against the woods grain. Use long even strokes, over lapping slightly.
- When the sandpaper is no longer cutting the surface effectively, discard it and get a new piece. Sanding wood can take considerable effort, new sandpaper is inexpensive compared to your effort.