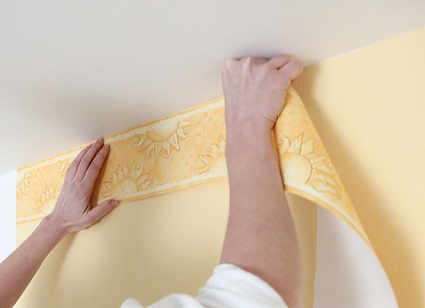
Borders are a quick and easy way to add interest and flare to any room. Whether hanging a wallpaper border for a kid-themed room, a classy dining room or just sprucing up your laundry room, there are many choices.
The good news is that this is an easy do-it-yourself project. Borders come with basic instructions, which are just that: basic. Professionals do not include their secrets on the instruction slips, but with a little help, you will be hanging wallpaper borders with ease in no time.
There are three simple steps. Decide where you want to hang the border. Prepare to hang the border. And finally, hang the border.
Where do I want to hang a wallpaper border?
Borders can be hung at any height, but generally borders are found around the ceiling or at chair-rail height (32″ from the floor to the center of the border). Borders most typically come in 15′ rolls and are long enough to cover most walls without having a seam break mid-wall.
What do I need to do before I start hanging the wallpaper border?
Prepare, prepare and prepare! As with any project, half the battle with any successful wallpaper project is preparation. You are going to want to check for any blemishes, like paint drips along the tops of the wall or cracks along the corners. Bumps will make it hard to lay the border smoothly.
Note: It’s possible to hang wallpaper borders over wall textures but rough textures will show through. Using a fairly thick or tough border will help hide the underlying wall texture.
You will want to use matching colored caulking for the cracks and a paint scraper for the paint drips. Most borders are fairly thin, so if there are any blemishes, and you do not repair them beforehand, they will really stand out. It is best to fix them now, rather than see them once you have done all that work.
Here’s a word to the wise. Do not use prepasted borders in humid climates or in your bathroom. These types of borders do not stick well to glossy surfaces. You’ll need to buy wallpaper paste if you are applying the border in a humid place, such as your bathroom.
How do I hang the wallpaper border?
Now that you know where you want to apply the border and have the wall ready, you are ready to hang the wallpaper border.
The old carpenter’s saying goes: Make sure you measure twice and cut once. Always start in the darkest or most unnoticeable corner of the room, so the almost inevitable pattern mismatch or beginner’s mistake won’t be as obvious as you finish your project.
Also, if you are hanging borders over freshly painted walls, it is best to wait approximately 30 days for the paint to cure. Otherwise your border may start peeling as your paint cures.
Pre-pasted borders don’t work well in humid climates such as your bathroom and kitchen. The glossy paint used in kitchens and bathrooms that make the walls resistant to moisture and easier to clean requires more adhesive. Pre-pasted borders do not stick well to glossy surfaces.
For best results in any environment, make sure to apply premixed wallpaper paste before you hang your wallpaper. Paint this on the wall. Now, wet the border by running it quickly through a water box (or use a wet roller). Apply the wetted border, and then wipe each section down with a damp cloth or sponge.
If you happen to be working with a darker colored border, no matter what you do it always seems the white edge seam shows. A good tip for fixing this issue is to use your child’s colored pencils and color in the area.
A wallpaper border will add that extra decorative touch to any room in the house. This is one of the easier DIY projects.


