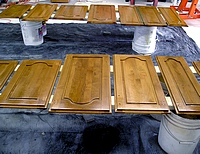
It’s important to know the basics of refinishing kitchen cabinets if you want to have the results look professional. Refinishing your kitchen cabinets can enhance the value of your home considerably, but only as long at the job is done correctly.
Preparation
 Many do-it-yourselfers overlook the importance of preparation. Professionals have learned that proper preparation makes the whole refinishing process so much easier.
Hardware Removal
Nothing looks less professional than painting the cabinet hardware. The only possible exception is when you truly are trying to achieve an old kitchen look and your cabinets have exposed hinges. Then you can consider painting the hinges. At the same time, the paint always chips away, so it ends up looking messy. It would be far better to replace old hinges with new that coordinate with your new look.
Sanding
 Sanding sponges work great for this task. Medium-Fine grit will be fine for the initial sanding to remove drips and thick edges.
For the final finish sanding use 180 grit to make sure everything is smooth. This is a time consuming part of any kitchen cabinet refinishing project.
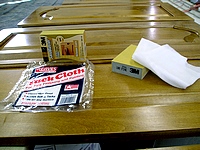
Once all the surfaces are sanded smooth, remove the fine dust. This is called tacking. If you have a shop vacuum use it to remove the bulk of the dust. Any sanding dust that is still on the surface can be removed with a slightly damp cloth. You can buy tack rags at the hardware store for this. But tack rags can be made at home with a regular rag and some hair spray.
Final Cleaning
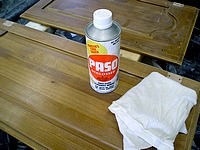
 It is a good idea to conduct a final cleaning using a deglosser. Apply with clean, soft rags to remove any remaining contaminate. Deglosser will also soften the surface prior to application of any stain or finish.
Some or all of these steps may be necessary when refinishing kitchen cabinets. It depends on their condition and your expectations.
If only a few light scratches are present, cleaning and light sanding before finishing will be all that is required. An entirely new stain color will involve complete removal of the existing stain and finish.
Before beginning your kitchen cabinet refinishing project, judge for yourself the extent of preparation that will be practical. Refinishing kitchen cabinets can be a quick weekend project, or a week long endeavor. But the best rule is to always start with a clean deglossed surface that has undergone all necessary repairs before proceeding.
Staining
 Once you have the doors and frames fully prepared, staining and the application of a protective clear finish can proceed. Finding an exact matching stain color might be impossible. If you know the species of wood used to manufacture your kitchen cabinets, purchase a sample piece of wood. Take a cabinet door and the wood sample to your local paint store for a stain match.
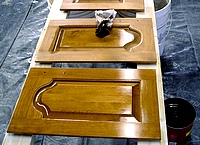
Using clean white cloths, wipe the stain onto all surfaces. Try rubbing the stain into the scratches for an improved look. A brush can be used for tight areas, such as raised panels on doors. Remove the excess stain with a clean rag. If some original finish remains on the surfaces, the stain can take several hours to dry. Allow a drying time of 16 to 24 hours before applying any clear finish.
Proper Rag Disposal
Don’t take chances. The rags used for staining and applying solvent-based cleaners need to be correctly disposed of, to avoid self-combustion. Put the rags into a steel bucket filled with water past the rags. Refinishing kitchen cabinets can be dangerous when solvents are used.
Finishing
Once the stain is dry and you are satisfied that everything looks fine, you need to apply a clear protective finish.


