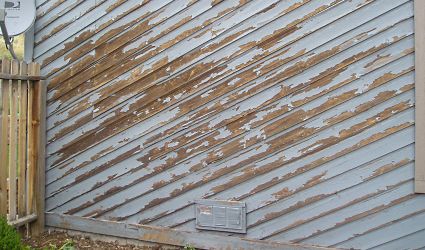
Rough sawn lumber is often more difficult to repaint than traditional, smooth lumber because of the roughness and depth of the wood grain. Paint can appear to be solidly attached, when it’s really loose. This can lead to damage from dry rot as water seeps behind the paint.
You want to prepare rough sawn lumber properly to ensure your new paint job seals the exterior of your home from the outside elements.

Here Are Six Simple Steps For Preparing Rough Sawn Lumber For Repainting
1. Inspect for any needed repairs and complete them. This would include identifying damaged boards and looking for missing flashing.

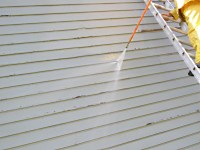
2. Mix a mild cleaning solution of warm water and dish detergent, soak the bristles of a stiff brush in the solution and scrub the wood. The water, soap and scrubbing will remove a majority of any loose paint. It will also begin removing grime that has accumulated in the rough surface of the wall. A cold water pressure washer can be used for large areas of siding. Be careful when pressure washing as wood can be removed or damaged.
3. Rinse the wood surface with clean water and inspect your work. Continue scrubbing the surface with your soap and water solution until wall is clean. If the soap and water solution does not appear to be working you can switch to a stronger cleaning solution of 2 cups of trisodium phosphate cleaner in 1 gallon of water. Make sure to rinse well. You must remove residual suds.
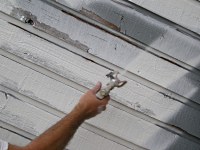
4. Peel away any loosened or peeling paint with a stiff putty knife or 5-Way paint scraper. You may also find a metal 2-edge paint scraper, or stiff bristle brush helps you pry up any loose paint ends for easier peeling. Remove as much loose paint as possible.
If you are working with a rough wood, such as sawn cedar, your only choice may be to use a wire brush. The wire brush can be attached to a power drill to speed up the process. Just be careful. Cedar is a soft wood that can be damaged easily if you are too aggressive.
Use a sharp scraper to feather the edges of remaining old paint that is sound and doesn’t separate from the wood. It is okay to leave old paint in place as long as it is in good condition.

5. Prime all raw exposed wood with a standard oil base wood primer. For excessive peeling areas a first coat of latex emulsion primer, like Peel Stop, can help glue down the remaining paint edges and prevent further peeling. Make sure to finish priming with an oil base wood primer. Normally spot priming the raw areas is all that is needed. For excessive peeling the entire surface should be primed.Oil base primers won’t react with the wood tannins like an acrylic primer. For tannin rich woods, like red cedar, use a stain sealing oil base primer.
Use a brush and/or paint roller to push the primer into the wood pores and any cracks. The primer can also be sprayed to speed up the priming but should be either back-rolled or back-brushed to increase adhesion.
6. Fill large cracks with a good paintable acrylic caulk, applies to cracks that cannot be filled with the paint top coat. This will prevent water from soaking into the wood and under the primer and paint, preventing future peeling.
If your rough sawn wood has been stained not painted, steps 2 and 3 should be all you need to use. Normally step 6 is for painted rough sawn lumber but large cracks on stained trim can be sealed using colored paintable caulking that approximated the stain color.


